This is one of and if not, the most important thing to do on your new store.
This page describes the steps to follow in listing your products on Tinycart as an Administrator
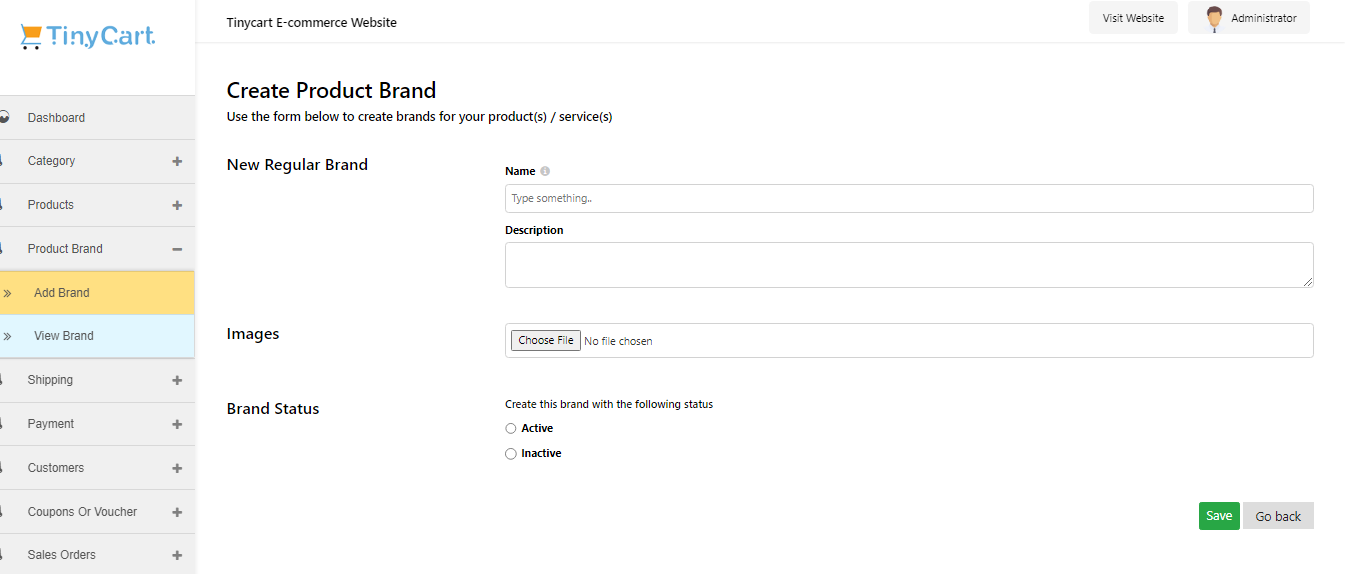
Creating Brands
(1) If your Product is a branded product or you intend to create one you head over to the dashboard on the left side of your screen and click on product brand
(2) Under product brand click on add brand .Once you’ve done that you’ll be taken to a page where you should see a form that will aid in adding or creating your brand.
(3) Fill the form accordingly;
- The name of the product
- The description (what it specializes in)
- Upload an image if available
- Activate the brand status
- And click save.
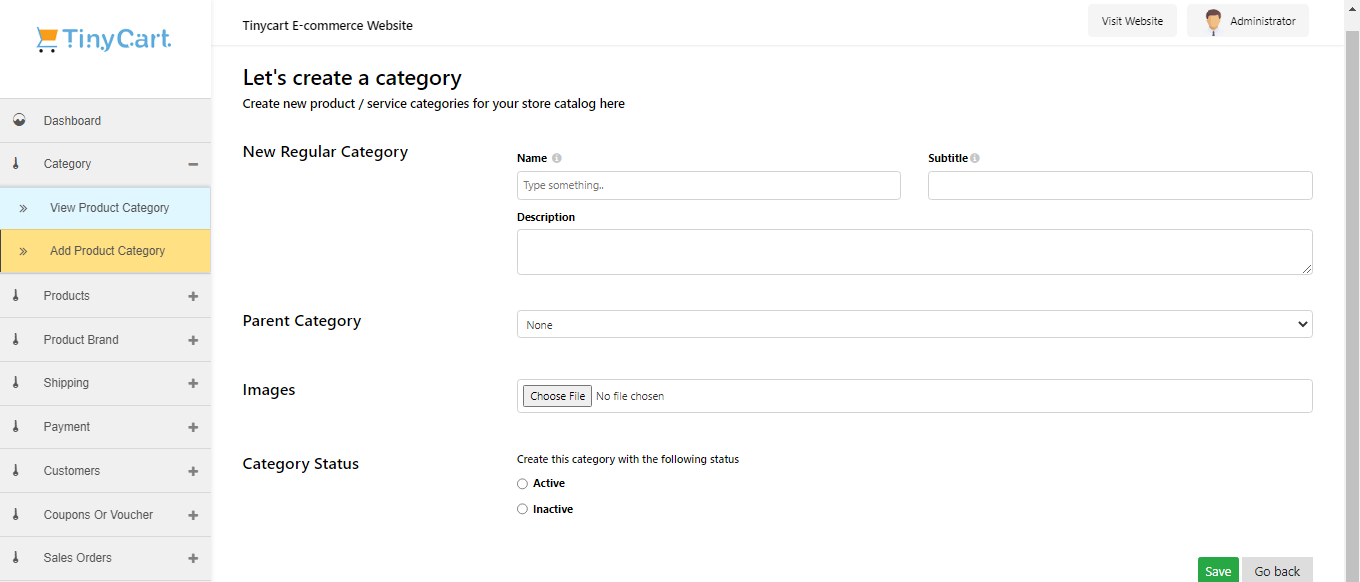
Setting Up Categories
After the brand has been created the next up is categories, and to get started just like with the brand creation;
(1) on the left side of your screen you head over to "categories" and click on "add Product category".
You will be taken to yet another form which you will need to fill out accordingly
(2) the name
(3) the description
(4) parent category (if available)
(5) upload an image (if available)
(6) under category status click on active and finish it off by clicking on save.
*P.S: There might be cases where certain products don’t have brands this is especially true for products that are handmade or homemade like skincare remedies or handmade fashion bags. If for instance I was selling a homemade skincare remedy, since it doesn’t have a brand it would fall under the category of skincare. Alternatively if I were selling branded products like apple smart phones, it would first fall under the brand: apple, then category: smart phone, because apple makes more than just phones, and the product would be whatever version of the phone I was selling, maybe an iphone 11 or a 12.
Now that you’ve completed the creation of brands and categories you can finally create your product.
Creating your Product
(1) On the dashboard on your left, click on “products” and “add products”.
You’ll be taken to the product creation page, once you’ve arrived you can see the different kinds of products that can be created;
- Regular products (books, DVD or household Items)
- Digital products (E-books, documents, audios) and
- Book a room (car rental, tent rental) although this is more of a service.
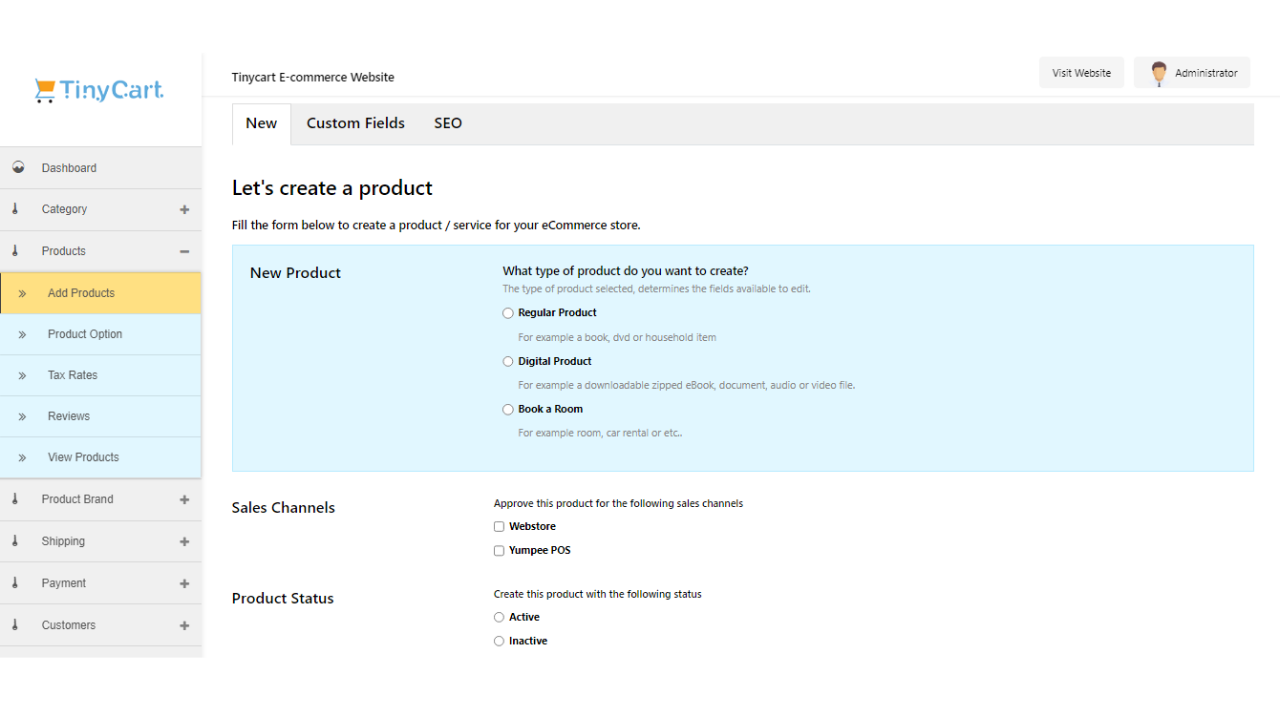
Pick the one that suits your business, set the product status to active, scroll down and begin to fill the form accordingly;
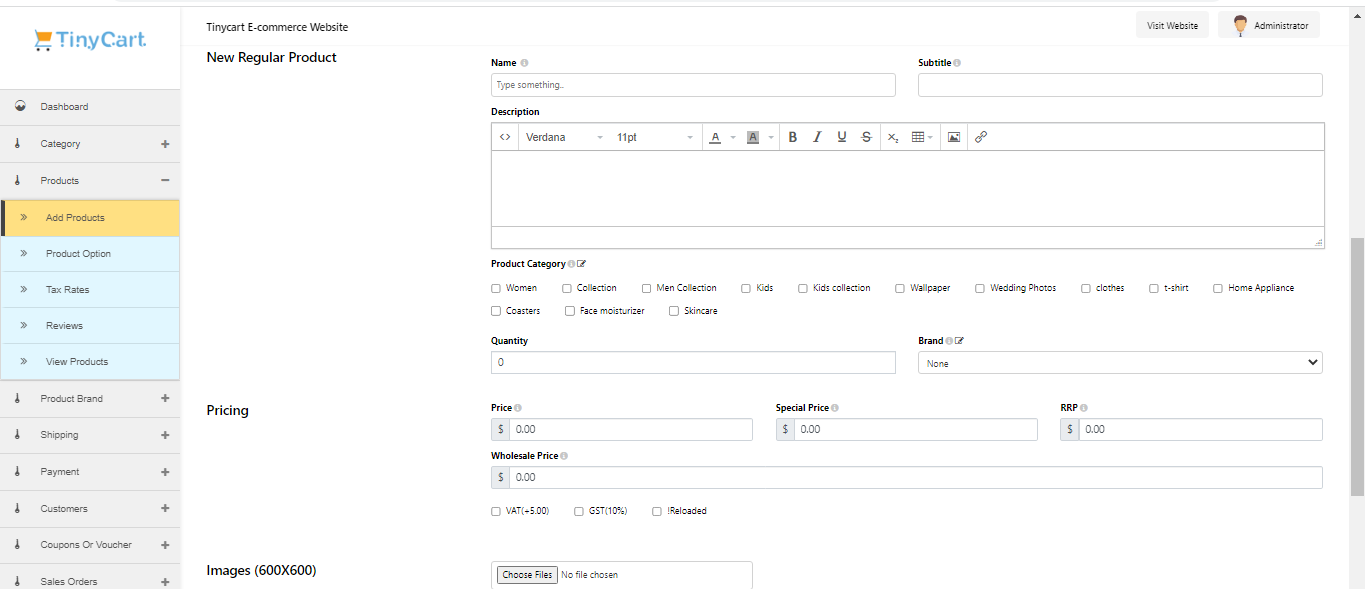
(2) The name
(3) The product description
(4) The product category
(5) The brand (if available)
(6) The quantity available and scroll down.
(7) Under prices put the intended price as this is various forms
- regular price
- special price (this could be discounts)
- RRP (regular retail price)
- Wholesale price (this is for customers that buy in bulk visit here to learn more)
Fill out at least one of them or all of them
(8) Next select your tax rate, only the ones you've created will show up. Visit here to learn more
(9) Next upload an image of your products while following the specified dimension (this is necessary as it is what customers will see on the front end of your store),
(10) under inventory input the SKU (stock keeping unit) and validate the stock status to “in stock” fill out the rest.
But before you click on save scroll back to the top and click on “Custom fields”.
This section is for more specific information about your products. For example if you ran a store that made custom rings, when ordering customer need to be able to put input preferences like
- Ring size
- Design
- Metal to be used, and more
This is usually different for each store and is created based on the products and or services you wish to sell once you've filled it all to suit your prefrence you can now scroll to the bottom and click on "save"
Now you've successfully created your product. The moment you click on save it automatically joins all other listed products.
Editing Listed Products
This is something that you might find necessary in your business later on, you might need to edit the information of a product as time goes on you might want to change
the name
- The description
- The display image
- The price…..
And many other things that may change about your product along the course of your business journey.
To get started;
(1) On your dashboard click on “Products” and then on “view products”
(2) Here you’ll see a list of all the products you’ve created
(3) Go to the product you want to edit and click on the pen icon, then click on “edit”
(4) you’ll be taken to a page with pre-existing information about your already created product
(5) Now you can edit all the information you want to
(6) And once you’ve completed all your edits scroll to the bottom and click on “continue setup”.
------
