The entirety of your stores front page is customizable. Yes your store has been completed, but assuming it was Christmas or Easter and you wanted to introduce a product that was specific to that certain holiday and would only be available for the duration of said holiday, you would need to make it so that people can see it upon landing on your front page. It’s not enough to just list the products and hope someone sees it while they’re passing through.
Your store needs to be very engaging while keeping up with current trends and events, this will make your returning customers intrigued. And this you can do easily from the backend;
(1) On the dashboard on the left go to "website" and click on "website settings"
(2) You will see the various setting options from
- General
- Home
- Shop... and more
these all control various features on the frontend of your store and here you can make all the edits you want to your stores front page.
*Ps: to make it easier, when making changes to the front end use 2 browsers. One for the backend and one for the frontend so you can observe your changes in real time and with immediate effect all you have to do is switch through browsers.
General
The first thing you’ll come in contact with is the general settings.
But before any major changes if you look at the top left of the form is the option to upload your logo (this is important as your logo can be regarded as your identity).
Once you've done that you scroll down to the options under “General settings”, you will see options such as;
- Address placeholder
- Mobile number placeholder
- E-mail placeholder
- Theme currency.... and more
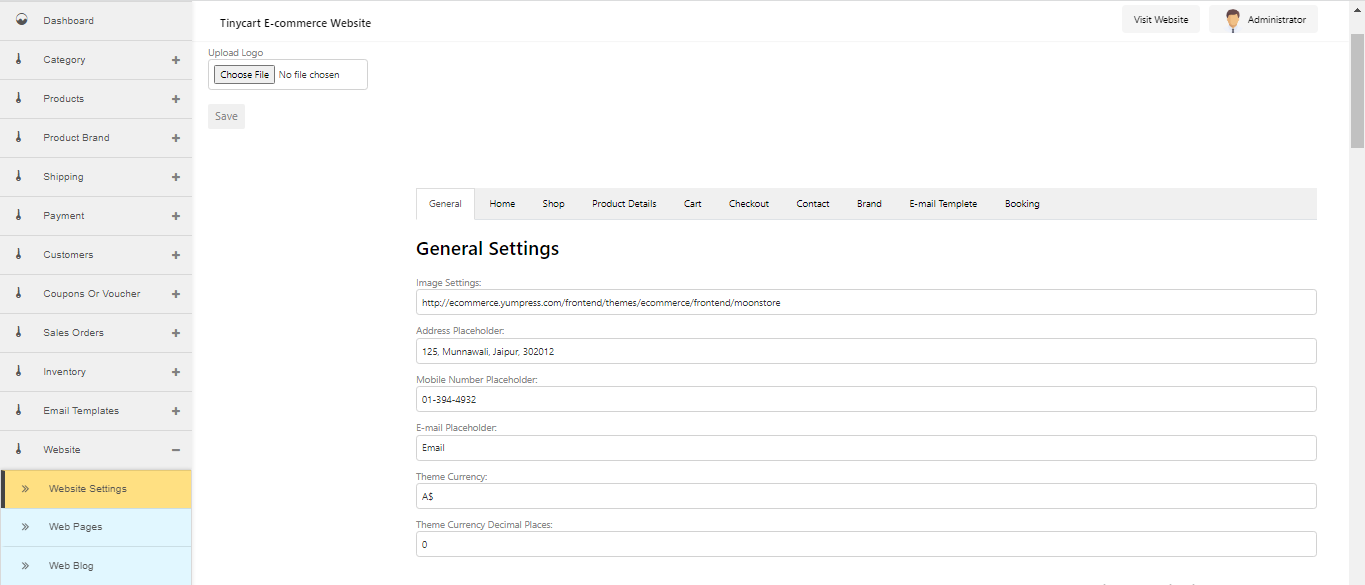
These are basic contact information and means of identification which will be displayed on your website, you can come back to change them anytime.
Next while still on the same page scroll down to “Header settings”, your header is the top and most conspicuous part on the frontend of your website especially to new users. It looks like this

It has;
- A Welcome text
- A search bar
- The currency you currently accept
- And even a little cart text and sub text
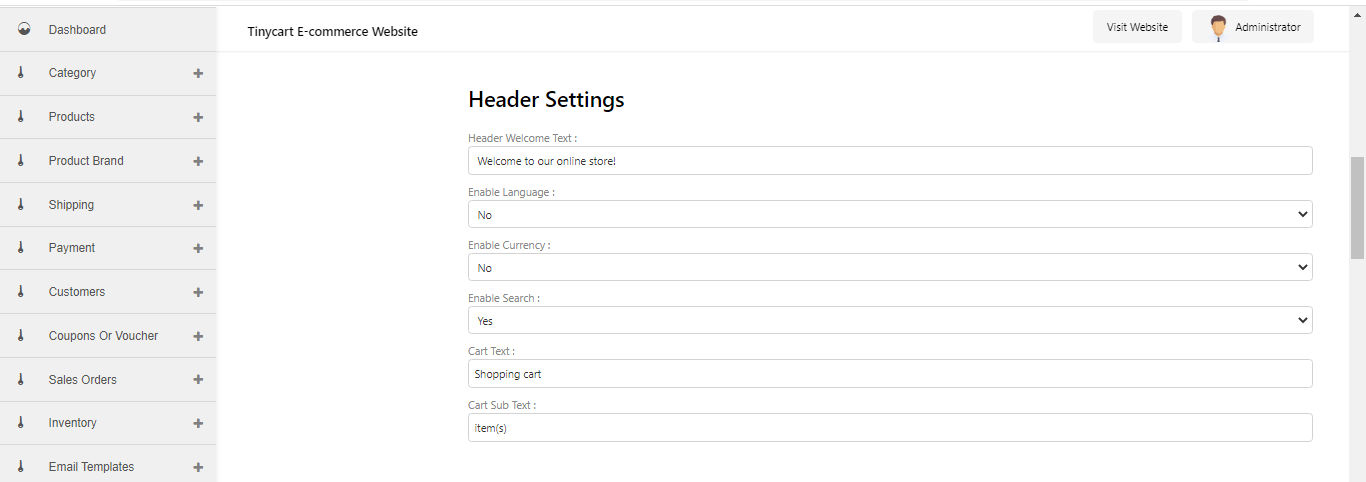
you can edit and turn on or off the features you want or don’t want.
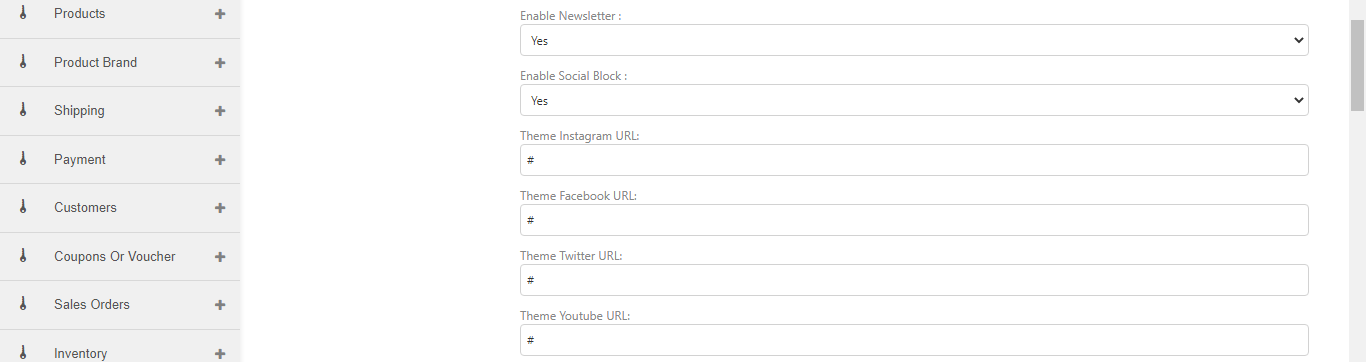
Then if you scroll further down you’ll see the “Footer settings” and like the name implies much like the header settings, is at the bottom of your website here you'll see the option to upload your parallax banner and under it you’ll see options such as;
“enable newsletter” and “enable social block”
and under “enable social block” you’ll see options such as
- theme Instagram URL”,
- theme Facebook URL” among others,
if you set “enable social block” to yes, you can copy and paste your social media links so when a customer clicks on let’s say the Facebook icon on your website they are redirected to your Facebook account the same method applies to all social media platforms available on the backend.
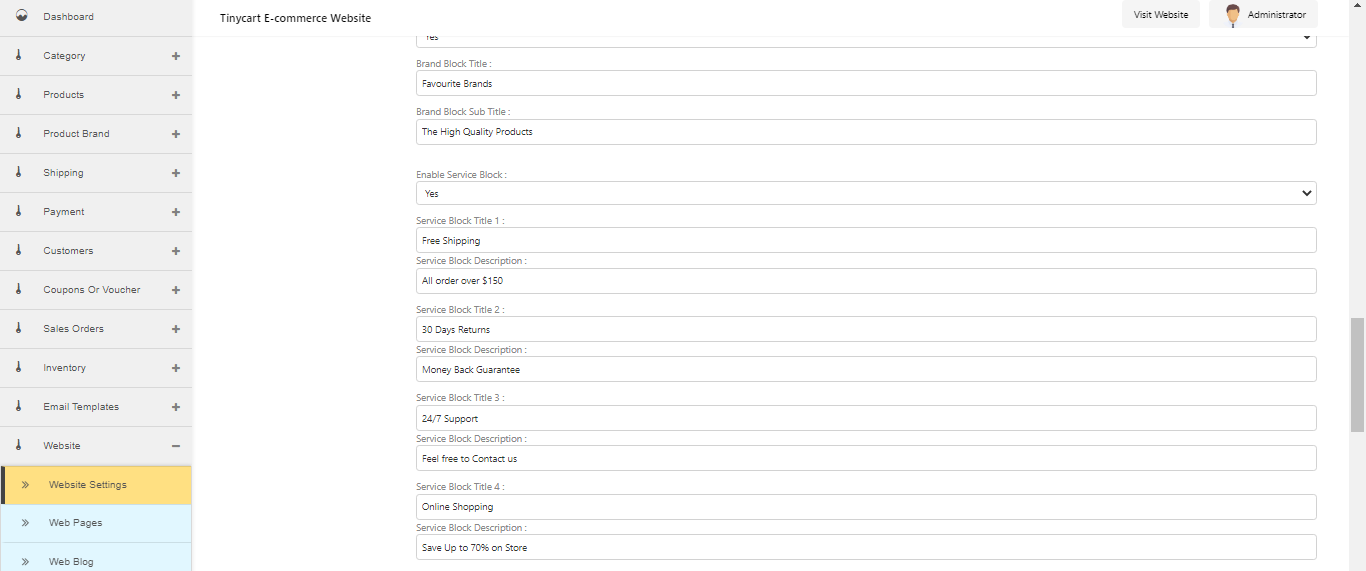
And if you scroll down even further you'll come across the brand block and service block, the brand block will display your created brands on your website. (visit Here for brand creation)
While service block carries an array of information from
- Shipping policy
- Return policy
- Customer support
These are important as they help out customers who have questions and tell them what they want to know or direct them to where they’ll get it.
Once you've filled out the form to your liking and turned on or off the features you wish to activate click on save.
Home
That was the basics under general settings now it’s time to learn how to make changes to your homepage. To get started;
(1) click on “home” from the list of options at the top, you should see the “Home page” option,
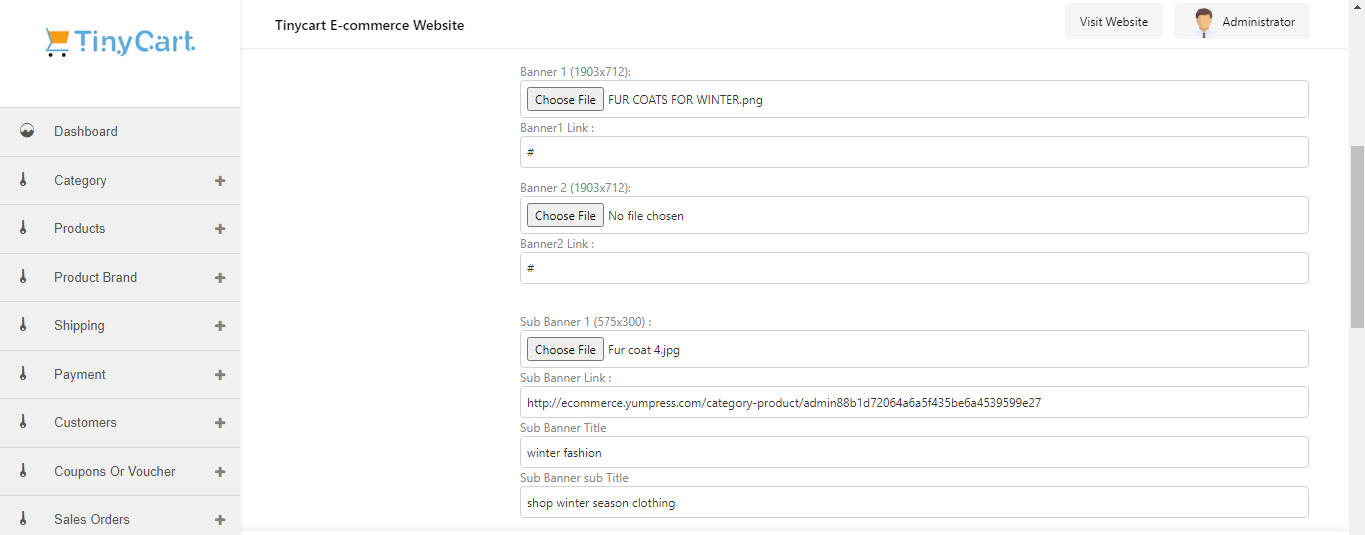
Once you arrive on this page you'll see banners and sub banners, these are what control all the posters and images on the frontend of your store.
And to edit them all you have to do is upload a banner file to the banner or sub banner you want
Note that all the banner file have specific dimensions for uploading, so keep in mind when doing so
With this you can change the entire theme and outlook of your store and keep up with the changing seasons and events while keeping your store intriuging
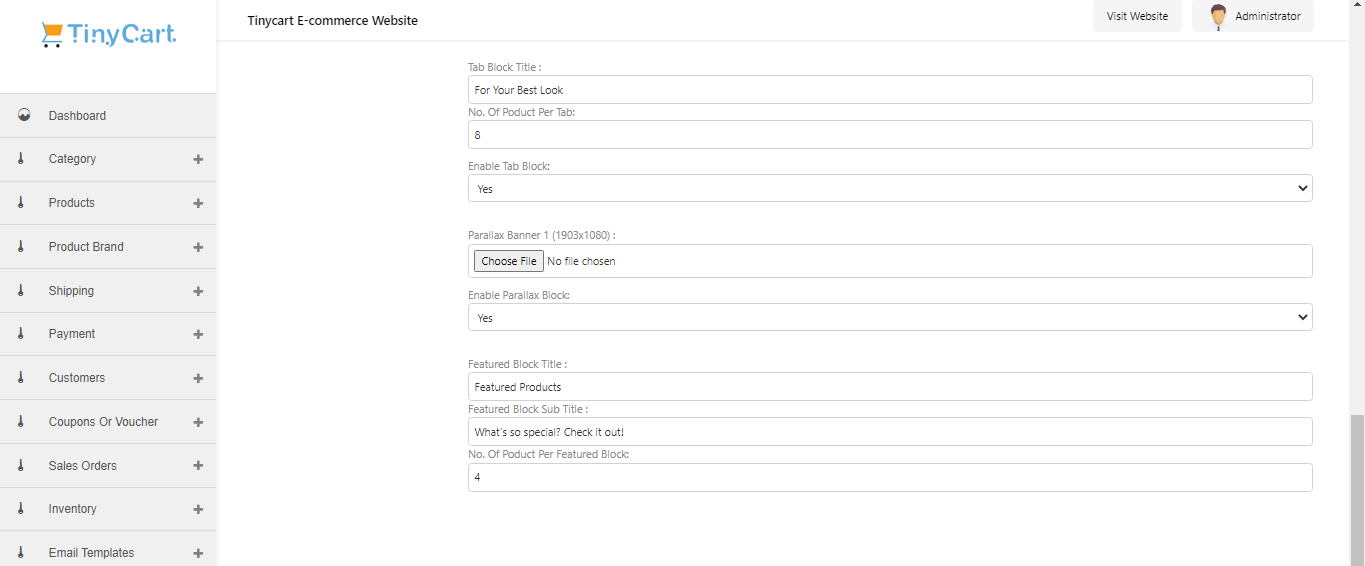
Next if you scroll down you'll see the tab block title and the featured block title, what these do is they create special columns or blocks where products can be listed, these are different from your main product section and more or less serve as customer intriuge, you can also edit the number of products that come up.
Once you're satisfied and have verified your changes you click on save.
Shop
This can also be called the product section, It is where customers (mostly returning) will go to straight away if they already know what they want to buy.
To get started;
(1) Click on Shop, and once the page comes up you can begin.
by making changes to this page you have the means to control the customers experience
- you can change the layout of the page
- you can control the amount of product that show up per page, among other things
- there's also the option to upload a banner
Once you've done all that you can scroll down to the filter settings, and some of the features include
- search bar
- price range filter
- brand filter
- category filter and more
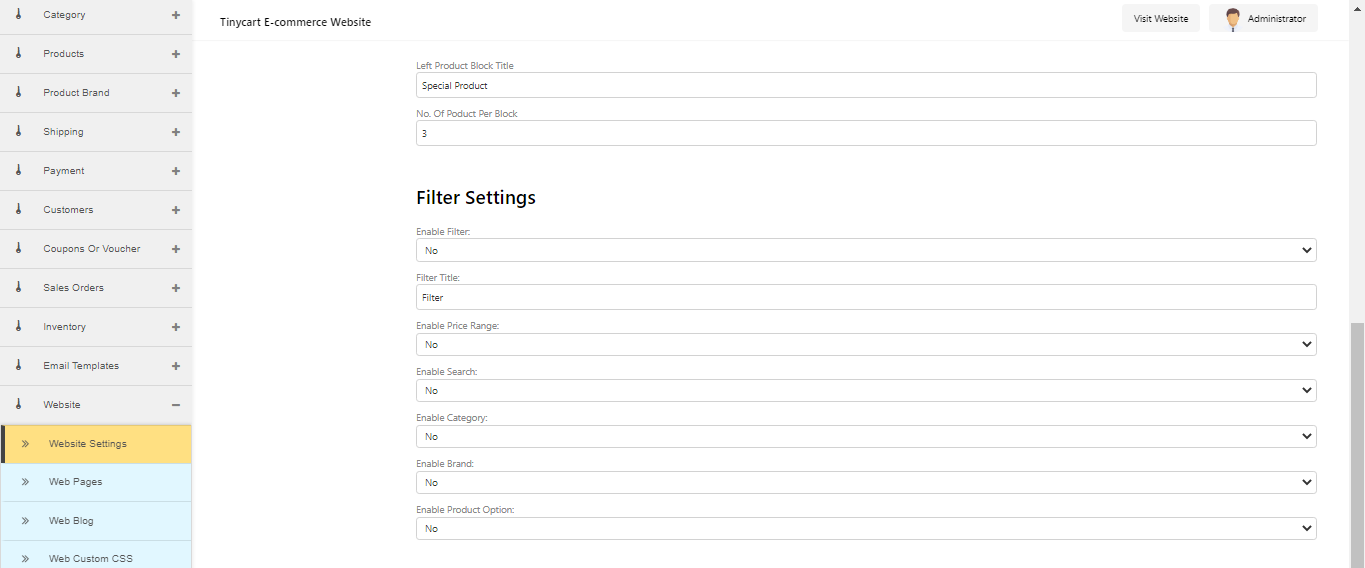
these features are types you can choose to turn on or off and they ultimately determine a customers experience, but it's better to leave them on as they make user experience easier for the customers.
Here's what your filter looks like on the frontend
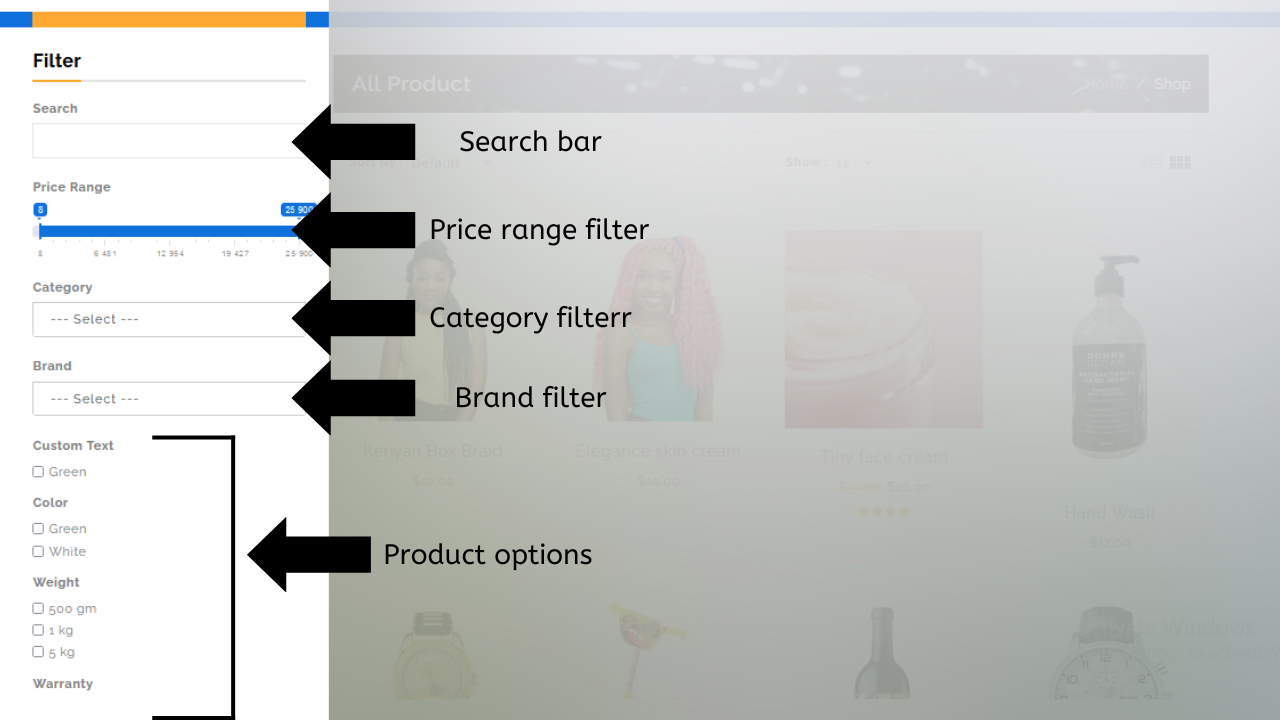
- The search bar is used to search for products via typed text (it's customer that know what they're looking for that mostly use this feature.)
- The price range filter helps the customers look for certain products within the price range they've inputed, (the way it works is it takes the lowest priced product and the highest priced product on your catalog and makes a price range index based on the two which customers can use)
- The brand filter helps the customers select products that are under a certain brand (this isn't necessary if your products don't have a brand)
- The category filter helps customers search for certain products based on categories under which the product falls into (the categories that will appear are the ones you've created while making your products). Visit here to learn more
Once you've finished all your edits scroll to the bottom and click on save.
-----
