Products can be dispatched in two main ways
- The first is Manually or outside the system
- And the second is by using the System.
Manual Dispatch
This is for small businesses mainly people who don't have or need warehouses to hold their products. Once the sales order has been recived, you handle the fufilment yourself.
You organise and package the product yourself and hand it over to whatever shipping carrier you are using.
This is all done outside the system with the only thing being done with the system is the recording of the status of the sales order, (visit here to learn about updating the statuses of sales order)
System Dispatch
This is the opposite of the manual dispatch where everything is run on the system. And this is mainly for large enterprises or people dispatchig from warehouses.
That can all be done using the following steps
(1) Creating the shipping package
(2) Creating the order
(3) Warehouse dispatch
Creating a shipping package
This necessary and should be the first thing to do, because once a customers order's been shipped out it will arrive in a package
To quickly make one;
(1) On your dashboard head to “package” under “shipping”
(2) Once the page loads click on “add new shipping package” at the top right corner of your screen
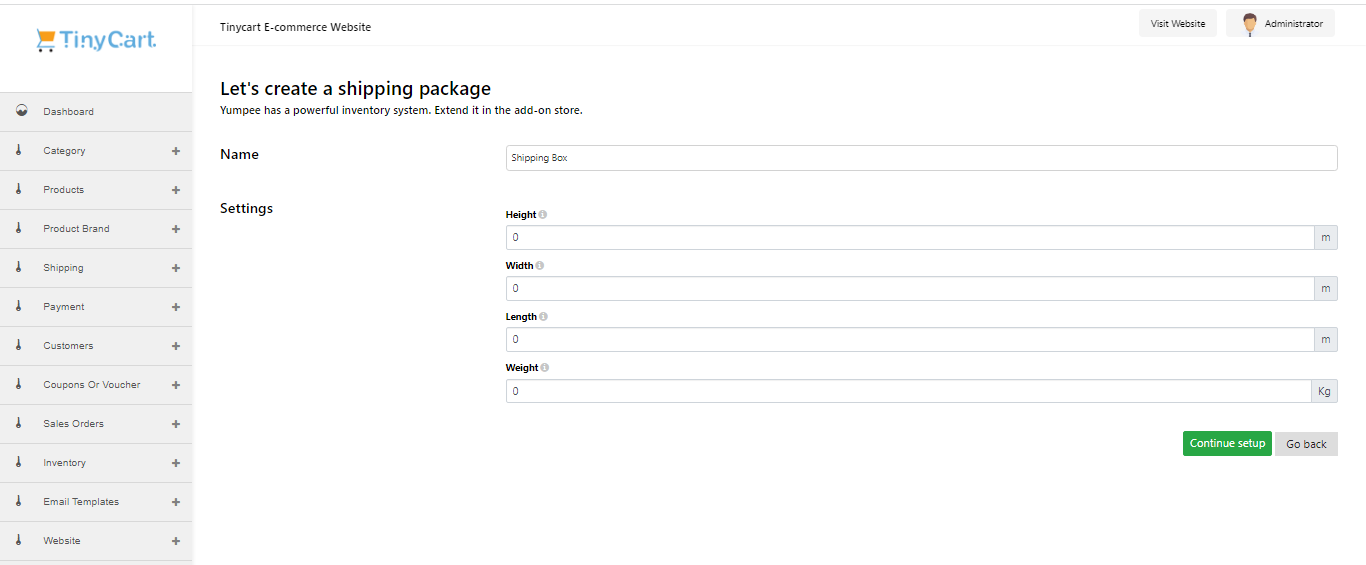
(3) Fill it out the form that comes up appropriately, this includes
- The name of the shipping package
- The height, width, length and weight of your package
You can and should have multiple packages for different products and can even custom make packages for special deliveries
(4) Once you've filled it out correctly click on "continue setup"
Once you've done that you can finally get started.
Creating the order
To get started;
(1) head to “sales order” on your dashboard and click on add order.
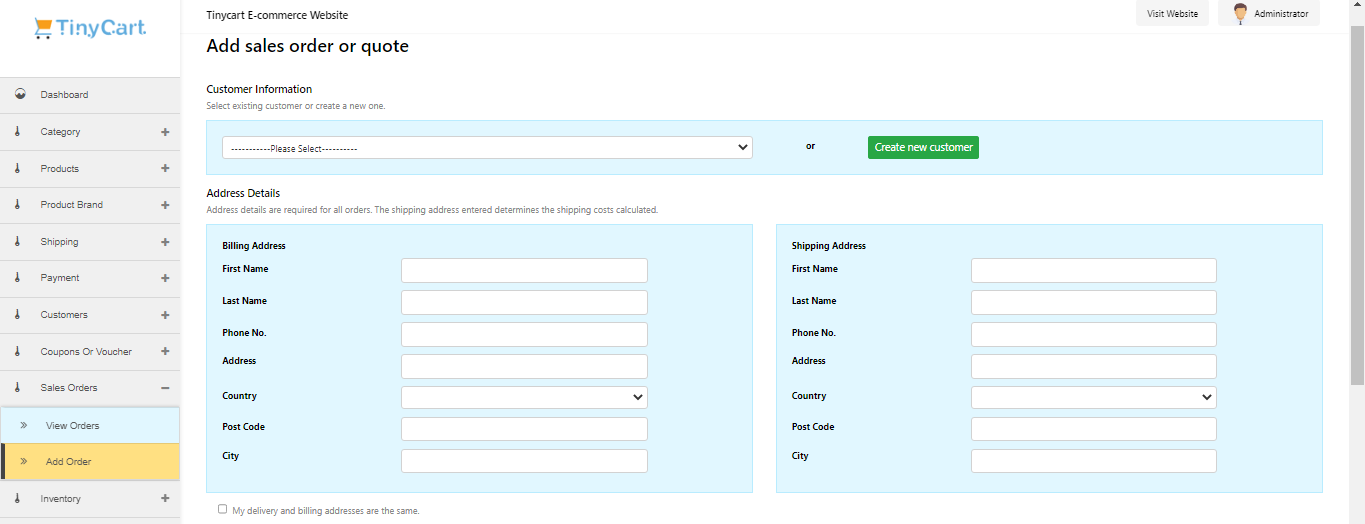
(2) Select the customer by clicking on the customer information bar, which is at the top of the form. keep in mind only customer information you've created in advance will show up here, and if you haven't you can just click on "create new customer"
(3) Once you've done that proceed by filling in the address details
- Name
- Phone number
- Address
- Country
- Postcode
- City
There's a checkbox at the bottom that validates this; "my shipping and billing addresses are the same” if it is, once you tick the box just fill out the address form that comes up, if it isn't fill them out individually.
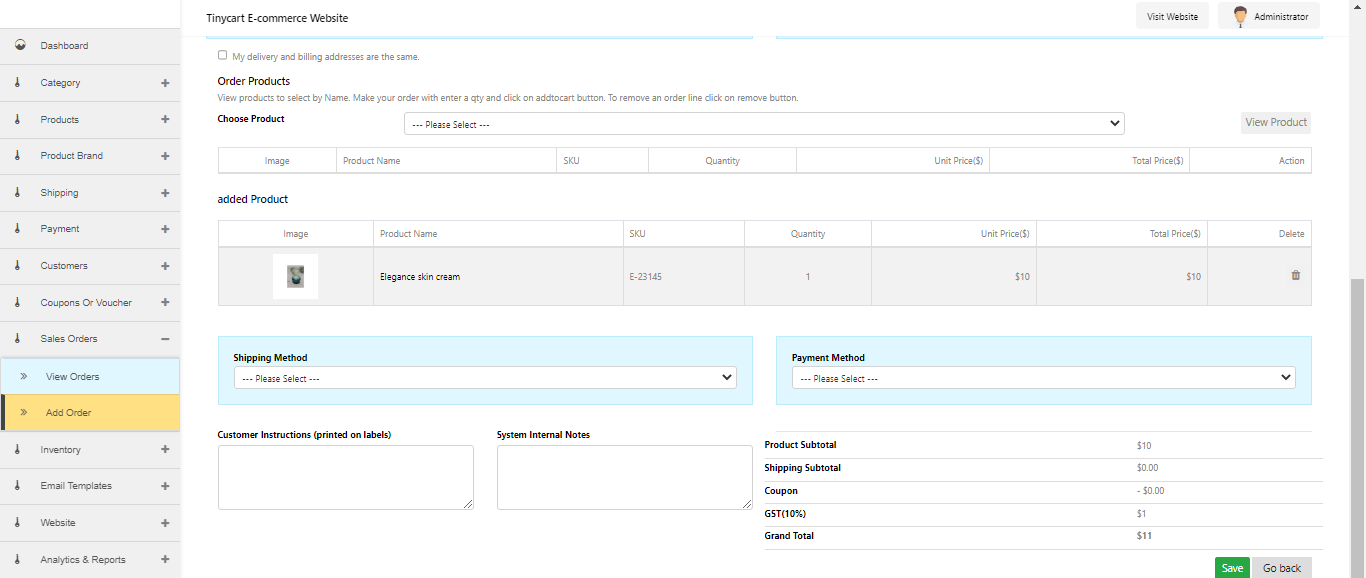
(4) Next select the product from the product option bar and click on view product
(5) Once you've done that the product should show just beneath the search bar here you can edit the quantity
(6) Once you've done that you can click on action to properly add the product to your list.
(7) Next select the shipping and payment method, keep in mind the shipping and payment methods that will appear are the ones you've created or integrated with in advance. (click to know more about shipping and payment)
(8) Next write out customer instructions (this will be printed onto the shipping labels), and system internal notes (if there are any to relay)
(9) Once you've done all this at the bottom left of your screen right above the save button should be a grand compilation of the products, shipping fees included. Once you've confirmed it click on save
Warehouse dispatch
This is the follow up to the completion of your created order. To get started;
(1) head over to “dispatch sales order” under "inventory" and
(2) Go to the order you just created, click on the edit button, and click on "pick and pack"
(3) You'll be taken to a page similar to that which you created your order
(4) Scroll down past the address information and select the product
(5) Once you've done that click on package and select the package you created earlier
(6) Next at the bottom of the screen you should see the "select source warehouse" bar, select your warehouse
Note: if you look at the product you're about to dispatch you'll see a column "dispatch warehouse", and in this column you'll see all the warehouses you currently have, and those warehouses will display the amount of the products they have or that you have stocked in them. This is important when selecting source warehouse as you can't select a warehouse that has insufficient or zero amount of the product you intend to dispatch
(7) Once you've selected the warehouse, click on "select carrier service" and select one from the options that come up and click on save

(8) Next you click on "Auspost options" at the bottom of the page and click on "create shipment"
(9) Once you've done that, while still clicking on "Auspost options" click on "create label"
After you've done the above you will see your shipment I.D and the option to print your label.
----
