Your business needs inventory management so you can monitor your warehouses without physically appearing where they are. With our service you can create, manage, and stock multiple warehouses from your backend as an administrator.
There are four steps to acomplishing this
(1) creating warehouse
(2) creating suppliers
(3) assigning products
(4) purchase order
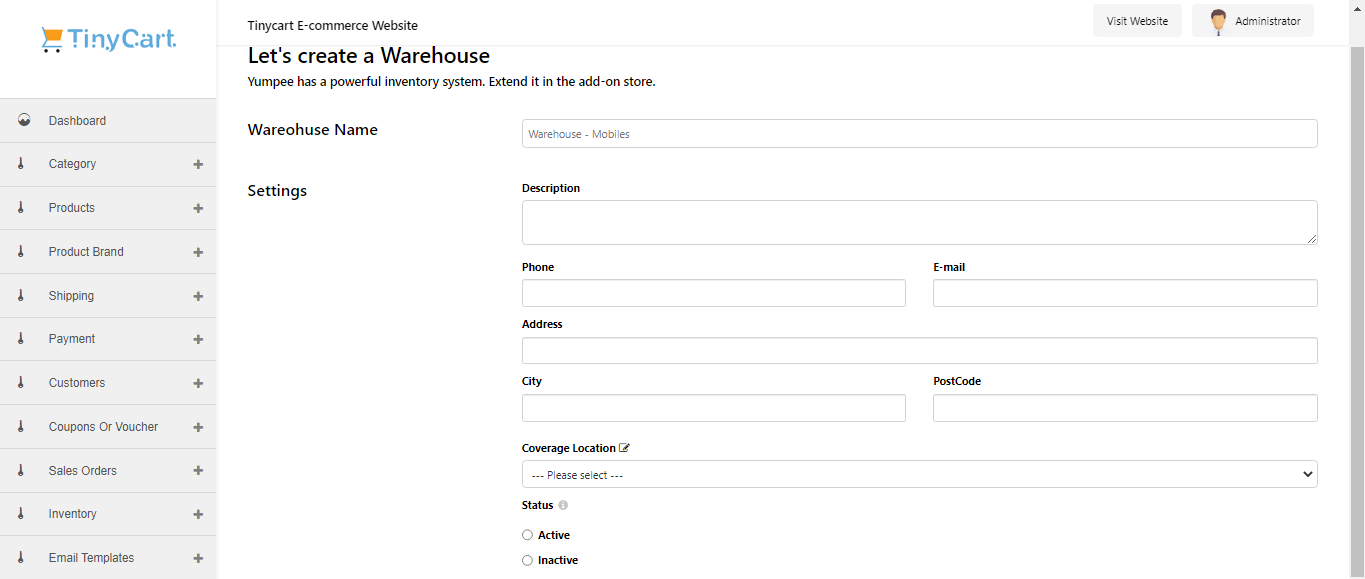
Creating a warehouse
To get started;
(1) on the left side of your screen head over to "Inventory" and click on "manage warehouse"
(2) afterwards you’ll see the “add new warehouse button” click it
(3) Fill in the necessary information like
- the name
- the description
- the contact information and the address
- the city and post code
- and of course the coverage location
Keep in mind the location is one that you’ve designated for the storage of products, when that's all done set the status to active and click on save.
Now that you've created your warehouse you need to create your supplier
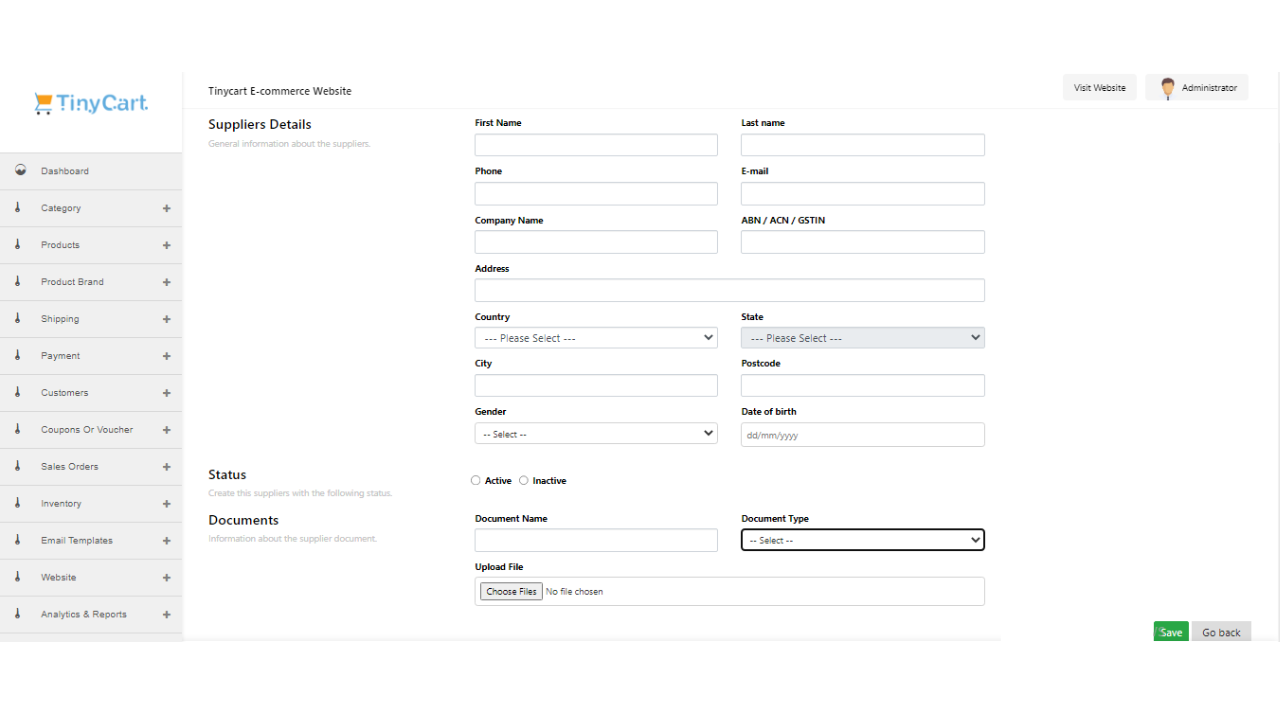
Creating Suppliers
To get started
(1) Head over to “manage supplies” which is under “inventory” on your dashboard. Here you can manage and add suppliers to your warehouses.
(2) Since you're creating a new supplier you click on “add new supplier” at the top right corner of your screen. You'll be taken to a new page.
(3) Once you arrive fill out the information that comes up on the form accurately, this includes;
- Name and contact information
- Company name and address
- Country
- City and postcode
- Gender and date of birth
- You can even upload document regarding your contracts with the supplier.
(4) Once you've done all that set the status to active and click on save.
Once you’ve saved it you can view the supplier you just created under "manage suppliers", here you can assign products.
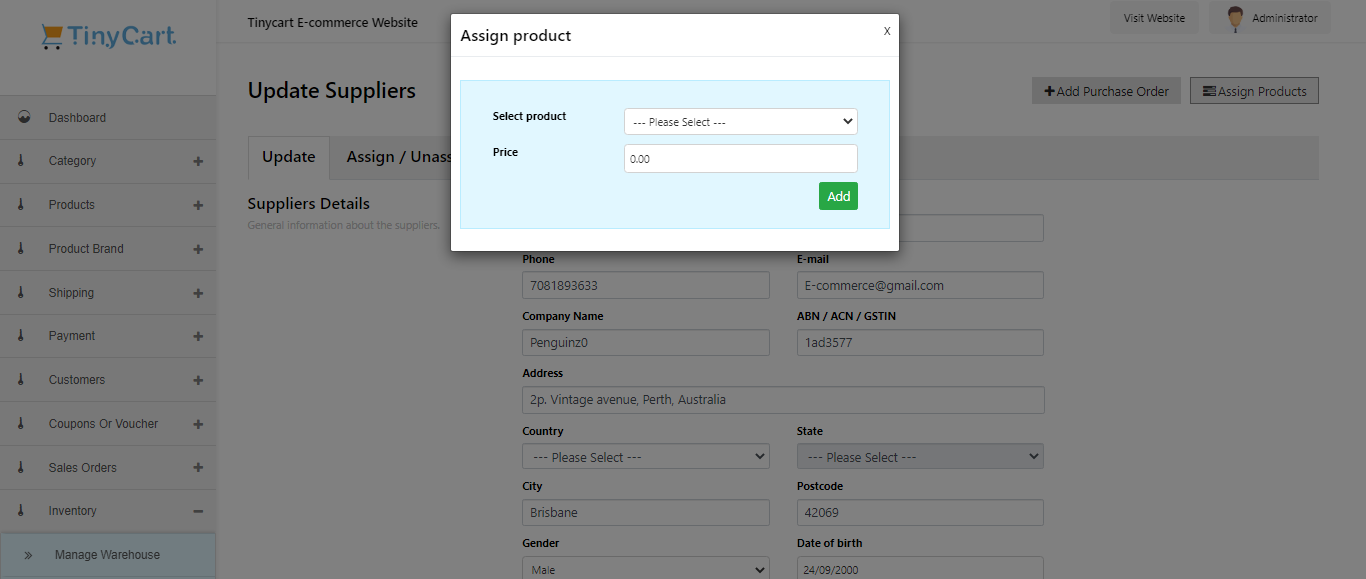
Assigning products
(1) Under the supplier you just created head over to the edit icon and click on "assign product", you’ll be taken to a page with the information of the supplier you just created
(2) On the top right side of the screen you will see the option “assign product” right next to the “add purchase order”
(3) Click on "assign products" and it will bring up a new tab with two fields “select product” and “price”
(4) Select the product you wish to assign and fill in the price [note: the products available for selection are products that have been created before]. Visit product creation to learn more
(5) Once you’ve selected your product and filled in the price click on “add”
You can repeat this process if you wish to assign more than 1 product to your supplier. Now that you've completed all that, the next thing to do is to create the purchase order.
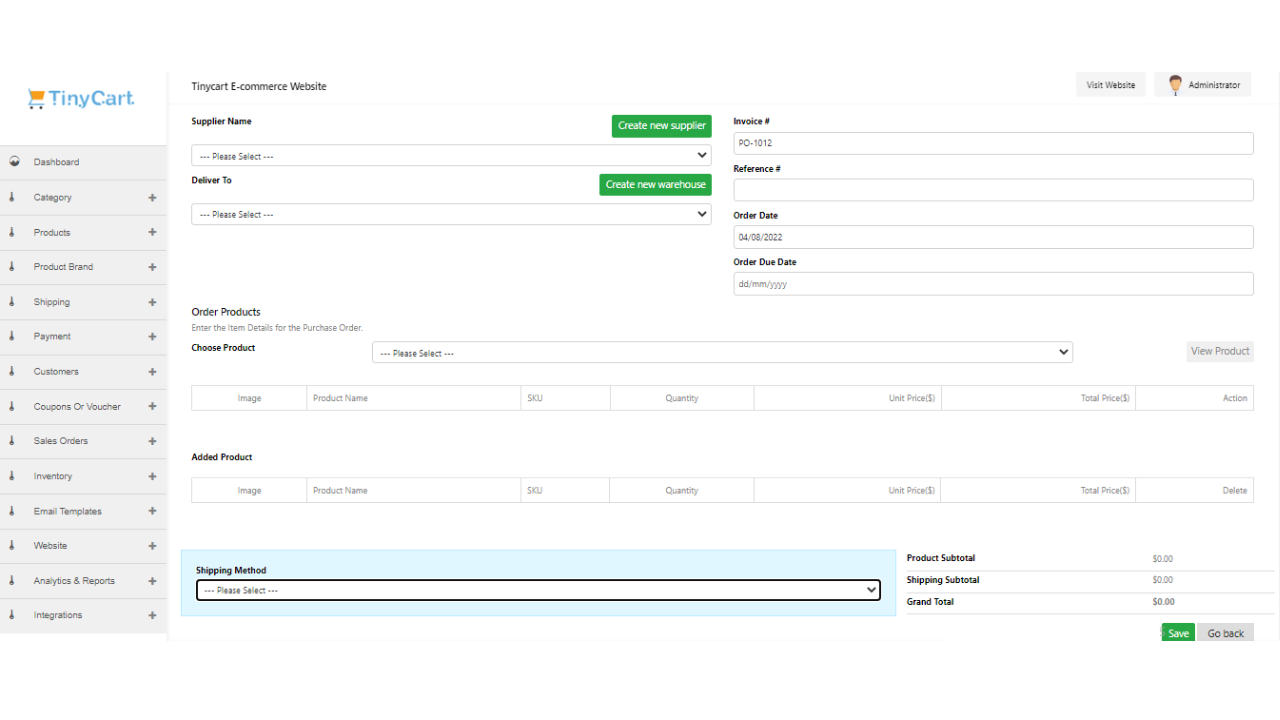
Purchase order
A purchase order is an official document that you issue to your suppliers, indicating relevant information about what you want to buy, the quantity, and the price agreed for that particular product or service. It is basically stocking the warehouse you created and there are many ways to go around it (visit here to learn more).
To get started;
(1) Go to "inventory" on your dashboard and click on "purchase order"
(2) After you’ve done that click on “add purchase order”
(3) After clicking on "add purchase order" you’ll be taken to a different page to fill out the necessary information
- the name of the supplier
- the warehouse the products will be heading to
- the order date and order due date
Once you've fillled in all the above you scroll down, keep in mind the suppliers and warehouses that will show up in the above options are the ones you've created in advance.
(4) Select the product you wish to be supplied (note that only products you've assigned to the selected supplier will show up) also you might have assigned multiple products to a certain supplier, so you can also choose more than one.
(5) Once you’ve selected your products click on "view product" this is on the right of your screen right beside the "choose product" bar. what this does is add the product to your list as opposed to just choosing it.
(6) Once the product has been added you can edit the quantity.
(7) Once you’ve done all that click on "action" to confirm your previous actions.
Once that has all been completed, scroll down
(8) select the shipping method (only the ones you've created or integrated with will appear here)
Once you've done all that if you scroll down to the bottom right of your screen you will see the grand total of your order, shipping fees included.
(9) Click on "save".
Next;
- While still under "inventory" click on "stock warehouse"
- You’ll be taken to a page where you should see a search bar, click on it
- And select "purchase order"
- One you've done that go the order you recently created
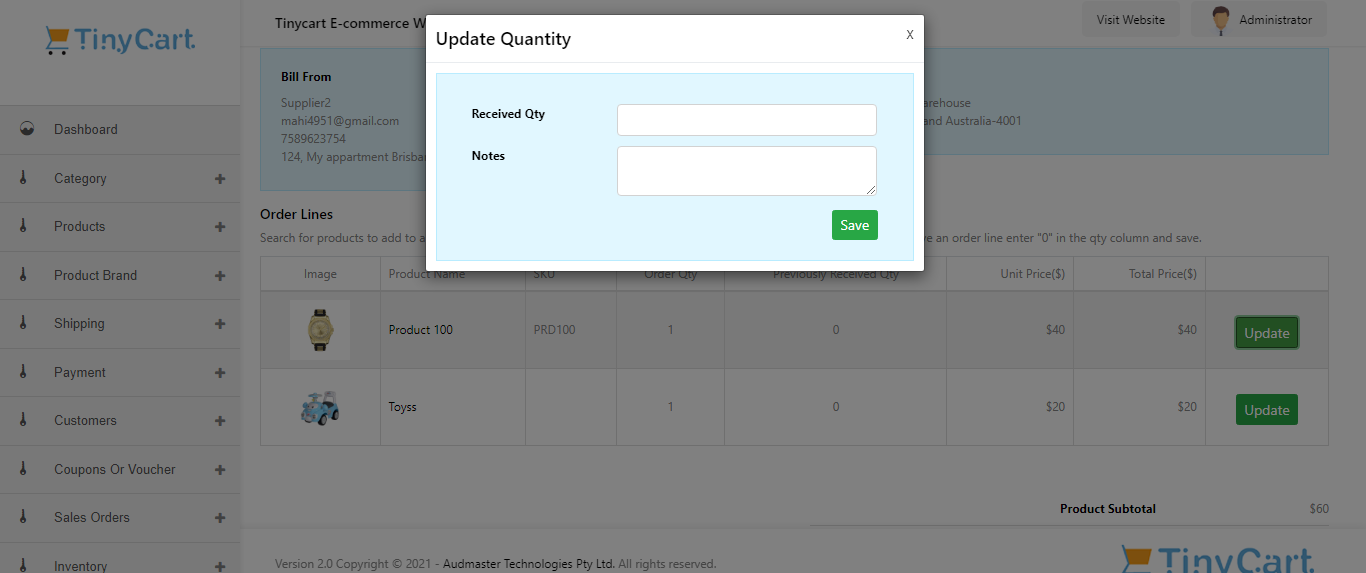
- Toggle your cursor under the edit button and click on “update stock”. You'll be taken to a new page
Now this is something that should probably be done after the order has been recived.
Once you arrive, under the product you received click on "update"
You'll be taken to a page you fill in the quantity that was received, if it was the amount you ordered or less, there can be discrepancies, you can also leave notes about the product.
-----
